
JPEG is one of the most commonly used image file formats just like PNG. When it comes to JPEG and JPG files, people are mostly confused and ask questions. So, to clear this confusion, there is no difference between JPEG and JPG files. They are the same, it is just about the number of letters in the name of both of the formats. JPEG is the originally launched name of the file format while JPG is new and customized. Earlier Windows used to accept 4 letter names, while later it limited the numbers of letters to 3. Hence JPG came to existence. JPEG is the older name while JPG is the new name of the file format.
So just like any other image file, video file, document or digital file, JPEG files are also prone to corruption. In this blog, we will discuss how one can open and view a corrupt JPEG files.
How do JPEG files get corrupt?
JPEG files can often catch corruption due to so many reasons and identifying corruption is sometimes confusing. So, to know what can lead JPEG file corruption, read the below mentioned causes:
- Virus and malware attack
- Corruption in the storage media
- Incomplete download
- Incomplete transfer
- Broken header of the file
- Bad sectors in the hard disk
- Sudden power failure or system termination
- Improper pen drive ejecting practices.
How to open and view corrupt JPEG files?
Let’s know how you can work around with corrupt JPEG files to open and view them on your system. We re providing some easy and quick solutions for the same, have a look:
- Download/Transfer Again If you have downloaded or transferred the problematic JPEG file from some source, then try to do it again. Sometimes incomplete download or transfer can make a file corrupt. So doing it again will give you a new file which is downloaded or transferred completely and carefully this time. If this was not your issue, try the next method.
- Restore from Backup You can also try to restore the corrupt JPEG files from the backup if any. There are times when backup comes very handy to fix many of our issues like corruption of data loss. So, we always keep backups for the same, if not, it is highly recommended to create and have backups with you for any such uncertainty. Get the backup file and restore all the images that you are struggling with.
- Convert file to another format Another way to work with corrupt JPEG files is to convert it to another format. Sometimes, the format in which the file is saved isn’t supported by your photo viewer app or system. So, to deal with this you can try to convert the file and check if it solves the issue. You can convert the file with VLC Media Player or with any other photo conversion tools.
- Repair and open with Photo Repair Photo Repair is an ultimate photo repair tool that fixes the corrupt images and saves them on your system. This photo repair tool is very powerful and can fix any sort of corruption present in your image file. Let’s check how this tool works:
- To work with the tool download the demo or purchased version of the tool and install it completely on your system.
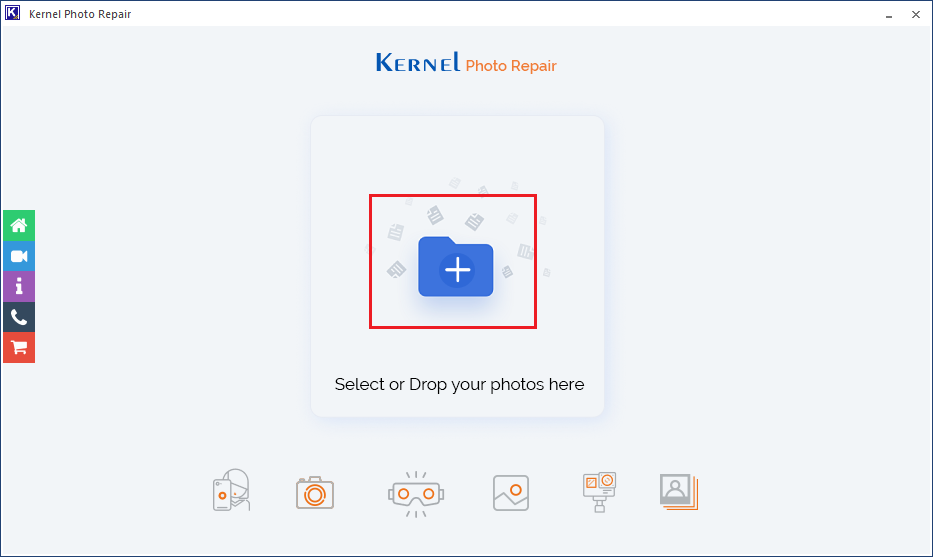
- Once done, run the tool and in the homescreen of the tool, click on the add icon you see there. By doing this the tool will take you to add the corrupt image files.
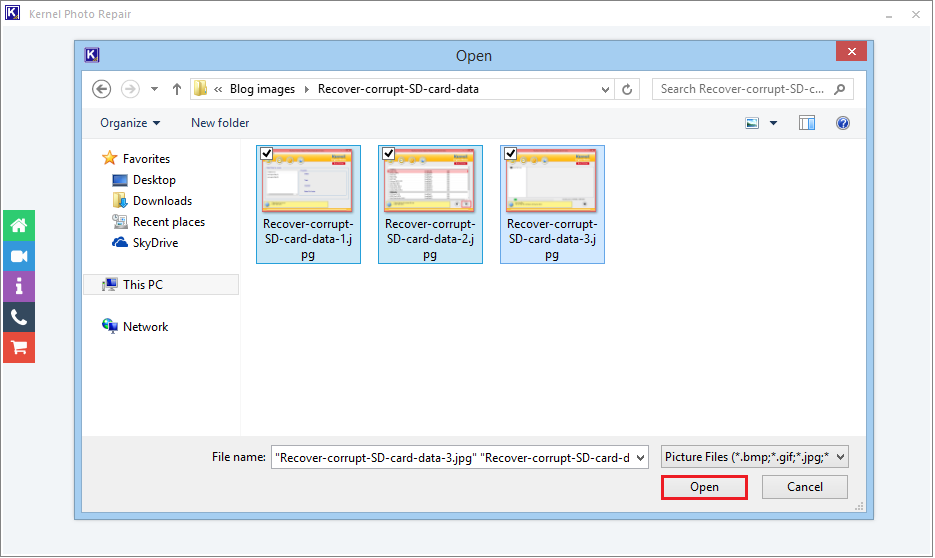
- Go to the location where your corrupt image file resides, and select all of them. Click on the Open button to finally add the files to the tool.
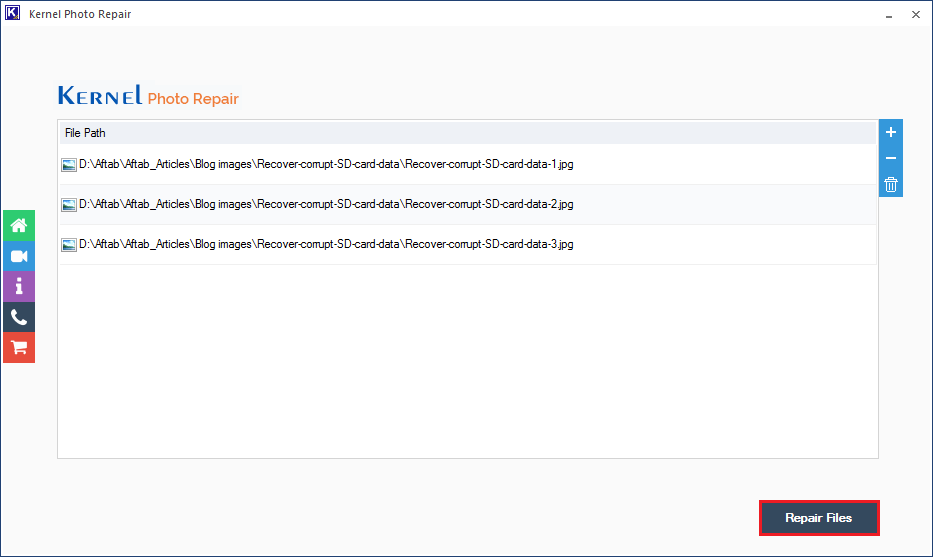
- Once you proceed, you will see that the selected files are now added to the tool. This time you can add or remove files as per your requirement. Once satisfied with the selection, click on the Repair Files option.
- Proceeding forward, provide destination to the files that you are going to repair. Go to the desired location and click on the OK button.
- Now, the repair process will take place, wait for the process to finish. You will get the live report on your screen and once done, you will see a green Success status. To finish, click on the Close button.



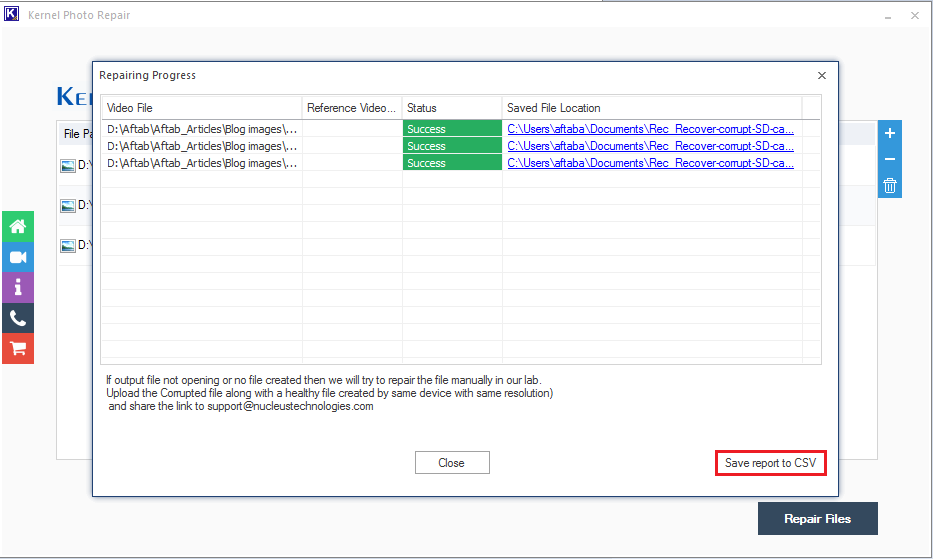
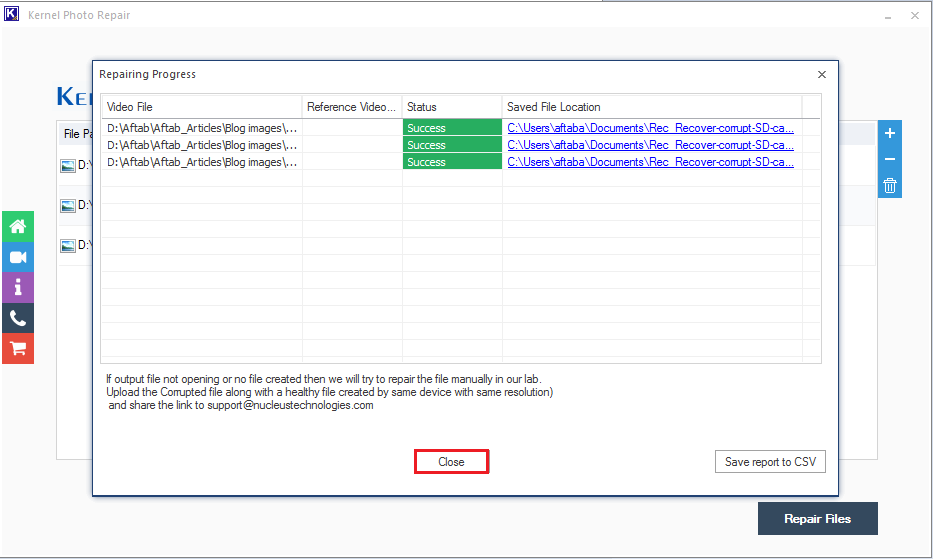
Note: Click on the Save report to CSV to get a detailed report of the process.
Conclusion:
In this blog, we discussed the corruption in JPEG files and how to fix it to open and view images on your system. We discussed how to know if it is corruption that has made your file inaccessible or not, how to detect corruption, and then finally we moved towards providing solutions. From all of the solutions we provided, using Photo Repair was the best one. Hope this blog helped you fix your problem.